Sections:
Ethics, Equipment and Conduct
Introduction to Sliding
Balance – Part 1
Balance – Part 2
Delivery – Three Step Technique
Delivery – Five Step Technique
Grip, Rotation and Release of a Rock
Position of the Rock for a Three or Five Step Delivery
Delivery with a Stick
Sweeping
Sweepers’ Roles and Responsibilities
Rules
Roles and Communication Between Players
Sliding – Traps to Avoid
Turn and Release of the Stone – Traps to Avoid
Different Shots and Signals
Timing
Strategies
Strategies – Continued
|
Here, we integrate the rock into the three step delivery.
Three Step Technique
- Approach the hack from behind.
- Place the non-sliding foot in the hack, toe at approximately 2-6 cm of the end of the hack.
- Step forward, sliding foot beside the non-sliding foot in heel-toe position (about 30 cm apart) so as feet are parallel and offset to allow a stable and comfortable position.
- Squat down.
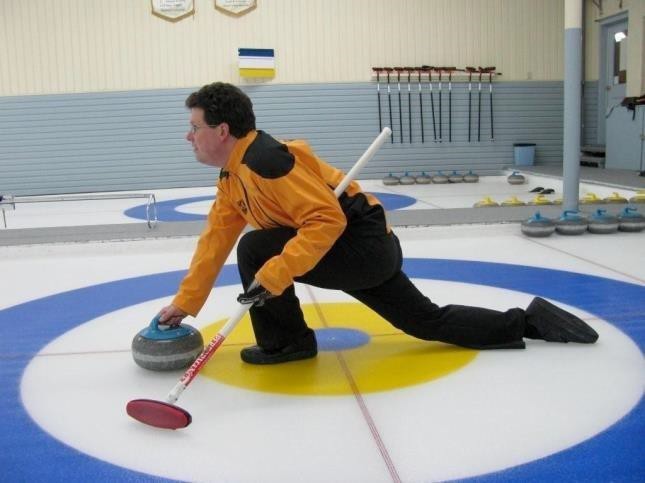
- Place the broom or stabilizer making sure the head, shoulders and knees are aligned towards the target.
- Hips should be raised so that the back is parallel to the ice.
- Place the sliding foot between the non-sliding foot and the hand holding the rock, giving it a 45-degree open and outward angle while remaining comfortable.
- Slide by pushing with the foot in the hack.
Line of Delivery
This explains the notion “aiming for the broom”. Beginners will tend to slide along the center line. With the line of delivery, they will learn to slide along an imaginary line, running from the toe of the hack foot straight to the broom in the skip’s hand. Two factors should always be considered: the body’s alignment and that of the rock.
Tips
- Keep shoulders straight
- Place the knee in line with the broom
- Place the rock in front of the non-sliding foot
- Stay balanced and keep the arm straight
Grip and Release During Delivery:
- First, get into position
- There exist two starting positions for the rock. (10-o-clock or 2-o-clock)
- Release of the rock is always at 12-o-clock.
- Release of the rock shall be initiated while sliding, before the player loses momentum. At less than a meter from release, the player turns the rock back to the 12-o-clock position. The total release distance should be equivalent to the length of a brush (from 10-o-clock to 12-o-clock). You must learn to synchronize speed and distance to release the rock at the right moment. You should feel that you control the rock without having to push it for lack of speed.
|


